Task 4: Retrieve Data from the Monitor
Hello World! How Are You?
Let's improve our previous sketch to make the output more readable and interactive.
Step 1: Add a Delay
Add int dt = 500; above void setup() to slow things down.
Add delay(dt); after your print line to pause between loops.
Upload and run your sketch.
// Lesson 1: Hello World!

int dt = 500; // delay time in milliseconds

void setup() {
  Serial.begin(9600);
}

void loop() {
  Serial.print("Hello World!");
  delay(dt);
}
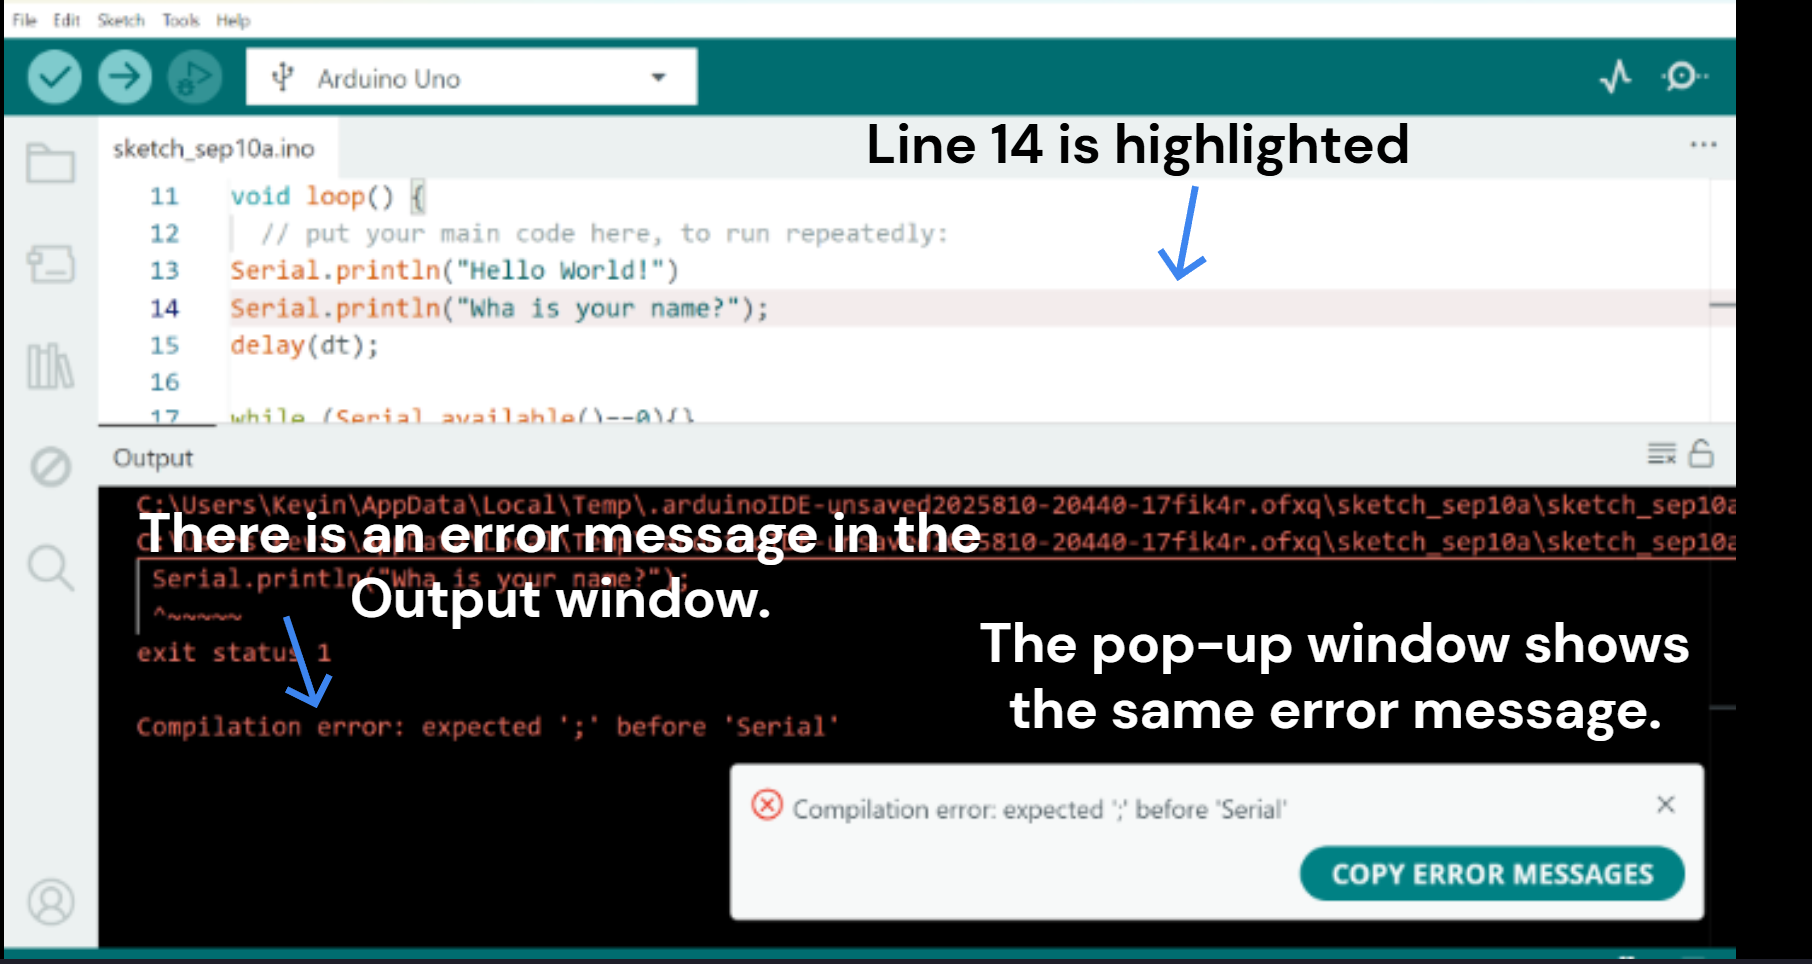
Step 2: Handling Errors
IDE shows helpful error messages when something goes wrong:
- Check the message window at the bottom of the IDE.
- Look for highlighted lines in your code.
- Check for popups with extra information.
- If you see expected ';', you likely missed a semicolon.
- Fix errors and click Verify again.
Step 3: Read Input from the Serial Monitor
// Lesson 1: Hello World!

int dt = 500;
String yourName;

void setup() {
  Serial.begin(9600);
}

void loop() {
  Serial.println("Hello World!");
  Serial.println("What is your name?");
  delay(dt);

  while (Serial.available() == 0) {}

  yourName = Serial.readString();
  Serial.print("Hello ");
  Serial.println(yourName);
  Serial.println("How are you?");
  delay(dt);
}
Time to Experiment
Try changing the dt value, the baud rate, or the printed string to see what happens!